
Using workflow templates
Start from one of the six pre-built workflows instead of building from an empty canvas.
VanMan ships six ready-made workflows. Starting from one and editing it is faster than building from scratch, and it shows you patterns worth copying.
Go to Settings > Workflows and click the Templates tab.
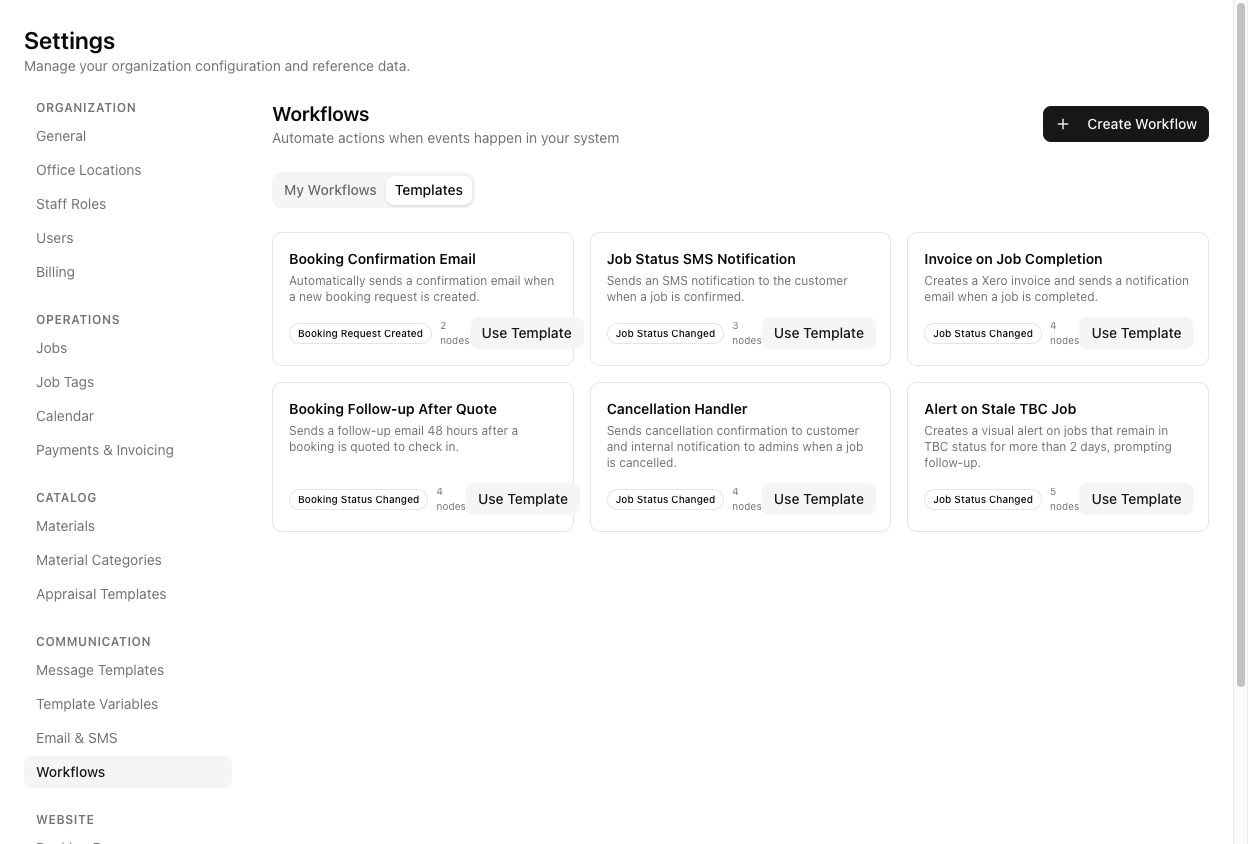
The six templates
| Template | Trigger | Nodes | What it does | | --- | --- | --- | --- | | Booking Confirmation Email | Booking Request Created | 2 | Emails a confirmation when a booking request comes in | | Job Status SMS Notification | Job Status Changed | 3 | Texts the customer when a job is confirmed | | Invoice on Job Completion | Job Status Changed | 4 | Creates a Xero invoice and emails a notification when a job completes | | Booking Follow-up After Quote | Booking Status Changed | 4 | Emails a follow-up 48 hours after a booking is quoted | | Cancellation Handler | Job Status Changed | 4 | Emails the customer and alerts admins when a job is cancelled | | Alert on Stale TBC Job | Job Status Changed | 5 | Flags jobs sitting in TBC for more than two days |
Booking Confirmation Email is an email, and it fires on a booking request, not a job. If you want to text a customer when their job is booked, the one you want is Job Status SMS Notification.
Use one
Click Use Template on the card. VanMan creates your own copy and drops you straight into the editor — there is no separate "open it" step.
You now have an independent workflow. Changing it does not touch the template, and you can use the same template again for a second variation.
Every template ships with its subject and body written inline on the node, not attached to one of your message templates.
So "adjust the messaging" means editing that inline copy — or switching the node to Use Template and picking one of your own from Settings > Message Templates. Do not assume it is already using your branded template; it isn't.
Click Back. Your new workflow is in the list marked Inactive. Click its Status badge to activate it.
Workflows created from a template are Inactive. Using a template does not switch anything on — the clickable Status badge on the list is the only place that happens.
Worth reading before you edit
Template bodies use the real variable syntax — {{CustomerName}}, {{JobStartDate}}, {{GrandTotal}}, {{InvoiceLink}}. Keep them double-braced and PascalCase when you edit around them.
Cancellation Handler is the one to study. Its condition's Yes handle feeds two email actions in parallel — one to the customer, one to admins. That fan-out pattern is how you do several things from one branch, and it is easier to copy than to invent.
Using a template requires the workflow create permission. Operators can see the Templates tab but the Use Template buttons are hidden from them.
Tutorial: adapt Invoice on Job Completion to your business
The template is close to what you want, but you invoice on a different status and want your own wording.
On the Templates tab, click Use Template on Invoice on Job Completion. You land in the editor with four nodes: trigger, condition, Create Xero Invoice, Send Email.
Click each node and see how it fits together. The condition checks newStatusName equals Completed; the Xero action runs on the Yes branch; the email follows. Understanding it now saves you breaking it later.
If your team invoices at Invoiced rather than Completed, click the condition and change the value. If you use the template's assumption unchanged, it will fire at a moment that does not match how you work.
Click Create Xero Invoice. Set Revenue Account Code if you want these invoices pinned to a specific account.
Remember this action needs the job to have cost items — a job with nothing on its Costs tab produces no invoice, and the step will fail rather than silently skip.
Click Send Email. It is set to Write Message with the template's stock wording.
Switch it to Use Template and pick your own invoice email. Now the automation sends the same branded message your operators send by hand, and you maintain the wording in one place instead of two.
Wait for the toolbar to read Saved.
Click Test and give it the Job ID of a real completed job with costs. Nothing is sent and no invoice is created — but you will see whether the steps resolve. This is the safe way to find out that the job had no cost items.
Back, then click the Status badge. Then complete one real job and check Logs for a Completed execution — and check Xero for the invoice. Watch the first one land before you trust it with the rest.