
Creating and editing message templates
Build reusable SMS, email, and estimate templates with variables and automatic status changes.
Templates are reusable messages your team can send from any job without retyping. They live under Settings > Message Templates, in the Communication group.
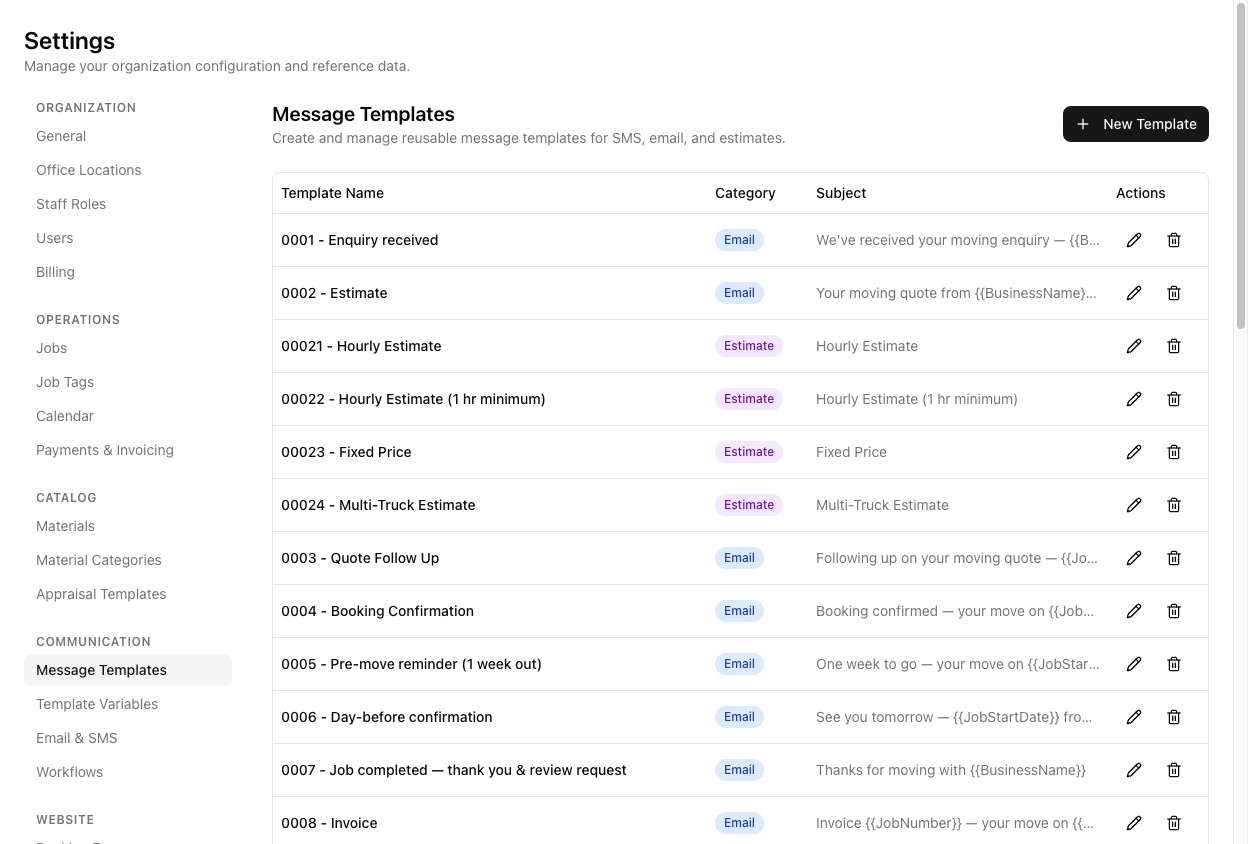
The list shows Template Name, Category, Subject, and Actions. A numbering convention in the name (0001 - Enquiry received, 0002 - Estimate) is a useful habit — it keeps the list in the order of your customer journey rather than alphabetical chaos.
Create a template
Click New Template. The editor asks for:
Required. This is how the template appears in the send dialog, so name it for the moment it gets used — "Day-before confirmation" beats "SMS 3".
Required, and it decides where the template can be used. Three options:
- SMS — selectable when sending an SMS. No subject line.
- Email — selectable when sending an email. Gets a subject and a rich-text body.
- Estimate — used to render customer estimates from an appraisal, not sent from the message dialog.
The send dialog filters templates by message type, so an Email template will never appear in the SMS list. If your template is missing when you go to send, check its Category first.
Defaults to No change. Set it to a job status and sending this template moves the job to that status automatically. This is how "Booking confirmation" can advance a job to Booked without a second click.
Use it for messages that genuinely mark a transition. Leave it alone for reminders — a reminder should not move a job.
Email and estimate templates only; hidden entirely for SMS. Variables work here too, which is why real subjects look like Booking confirmed — your move on {{JobStartDate}}.
SMS templates get a plain textarea. Email templates get a rich-text toolbar — bold, italic, bullet and numbered lists, undo/redo, and an HTML source toggle for when you need to hand-edit markup.
Click Save Template.
Variables
Insert variables with the Insert Variable panel on the right. They are double-braced and PascalCase — {{CustomerName}}, {{JobStartDate}}. Do not type them from memory; single-brace or misspelt variables fail in ways that reach the customer. This is covered properly in using template variables, and it is worth reading before you write your first template.
Email templates also support conditional blocks — {{if ...}} / {{else}} / {{endif}} — so a paragraph can appear only when it applies.
Preview before you save
Click Preview to render the template against sample data. It toggles to Hide Preview. Read it as a sentence, not as a checklist: a variable that resolved to nothing leaves a gap rather than an error.
For SMS, watch the length. Long messages split into multiple parts and cost more per send.
Editing and deleting
To edit, click the pencil icon in the Actions column — clicking the row does nothing. The heading changes to Edit Template. To delete, click the trash icon and confirm.
Creating and editing templates requires the messaging templates permission. Admins, Office Admins, and Operators have it. Drivers and view-only Users do not.
Tutorial: build a booking confirmation that advances the job
Create an email template that confirms the booking and moves the job to Booked in one action.
Go to Settings > Message Templates and click New Template. Set Template Name to 0004 - Booking Confirmation.
Set Category to Email. Do this before writing anything — choosing Email is what makes the Subject Line field and the rich-text toolbar appear. Pick SMS and the subject vanishes along with whatever you typed in it.
Set Auto-change Status to Booked.
This is the step that earns the template its keep. Sending this message now is the act of confirming the booking — your operator sends one email instead of sending an email and then remembering to change the status. The two can no longer drift apart.
Click into Subject Line. Type Booking confirmed — your move on , then use the Insert Variable panel: search start date and click Job Start Date. You get Booking confirmed — your move on {{JobStartDate}}.
Click into Message Body. Build it with the panel, not by typing variable names:
Hi {{CustomerFirstName}},
Your move is confirmed for {{JobStartDate}} from {{JobStartTime}}. We'll be collecting from {{PickupAddress}} and delivering to {{DropoffAddress}}.
Any questions, call us on {{CompanyPhone}}.
{{BusinessName}}
Every variable there came from the panel.
Click Preview. Check it reads as a complete message with no gaps. A missing word means a variable resolved to nothing.
Click Save Template. Open a job that is genuinely ready to confirm, click Send Message, switch Message Type to Email, and pick 0004 - Booking Confirmation. The body fills with that job's real data.
Send it, then look at the job's status. It has moved to Booked on its own.
Be deliberate about Auto-change Status. A template that moves a job is not one to use casually — resending a booking confirmation to a completed job would drag it back to Booked. Reserve auto-status for templates that mark a real transition, and leave reminders and follow-ups on No change.