
Sending an SMS from a job
Send an SMS to a customer from the job page, with or without a template.
Every message to a customer starts the same way: open the job and click Send Message in the header. There is no separate "Send SMS" button — SMS and email are two modes of the same panel.
Send Message sits in the job header, alongside Cancel Job and Delete Job. A panel slides in from the right titled Send Message — Send an SMS or email to the customer.
The top of the panel shows the customer's name, phone, and email. If the job has more than one contact, a Recipient dropdown appears first, with the primary contact marked by a Primary badge — pick the right person before you type. With a single contact, you get a read-only card instead.
Message Type defaults to SMS. Leave it.
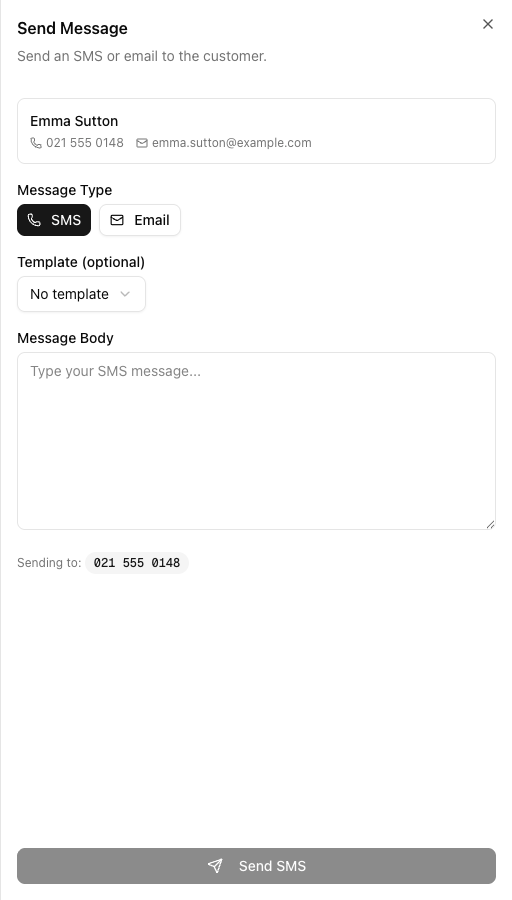
Template (optional) defaults to No template. The list only shows templates whose Category is SMS — if the one you want is missing, it is probably saved as an Email template.
Select one and the body fills in with this job's real data already substituted. Or leave it on No template and write free-hand.
Whether you used a template or not, read what is actually in the box. Every {{Variable}} should have become a real value. If you can still see {{CustomerFirstName}} sitting there literally, either the variable name is wrong or the job has no contact linked — do not send it.
The footer shows Sending to: with the resolved number. Confirm it, then click Send SMS.
What happens next
The message is queued, not delivered on the spot — you will see a "SMS queued for sending" confirmation. It then appears on the job's Messages tab, where its delivery status updates as the network reports back. See understanding delivery statuses.
When the Send button is greyed out
If the customer has no phone number, VanMan does not prompt you to add one. The Send SMS button is simply disabled and an inline message reads "Customer has no phone number". Fix it on the contact record, not in this panel. VanMan uses the contact's phone, falling back to their mobile.
Sending also requires the messaging permission — Admins, Office Admins, and Operators have it; Drivers and view-only Users do not see the button.
Tutorial: send a running-late text
Your crew is ninety minutes behind. Here is the fastest correct way to tell the customer.
From the calendar, click the job block and choose View Job. You need the full job page — the calendar's side panel only offers View Job and Call, not messaging.
The panel opens in SMS mode with the customer already loaded. No need to look up their number.
Leave Template (optional) on No template. This message is specific to today and does not exist as a template — that is exactly what free-hand is for. Do not force a template to fit.
In Message Body:
Hi Emma, it's Alex from VanMan. Our morning job ran long and we're about 90 minutes behind — we now expect to be with you around 11:30am. Sorry for the delay, we'll call when we're 15 minutes out.
Note there are no variables here. You are writing one message to one person; typing "Emma" directly is fine and faster than reaching for {{CustomerFirstName}}. Variables earn their keep in templates, not one-offs.
Read the Sending to: badge. If this job has several contacts — the customer and the person meeting the truck — make sure the Recipient dropdown has the right one. The person waiting at the house is the one who needs this.
Click Send SMS. You get a queued confirmation.
Open the Messages tab. The message is logged as SMS to Emma Sutton with a status badge. If the customer replies, their reply threads into the same tab.
If you find yourself writing the same message a third time, it should be a template. Anything with a predictable shape — running late, on our way, job complete — belongs in Settings > Message Templates with variables doing the personalisation.