
Setting up your account
Configure your business details, hours, customer links, and localization in VanMan.
Before you start scheduling jobs, configure your business profile. These details feed your invoices, estimates, emails, and booking form, so getting them right once saves correcting them on every document later.
Everything on this page lives under Settings > General.
There is no Save button on this page. Changes are saved automatically as you type — the page says so at the top. Click away from a field and it is stored.
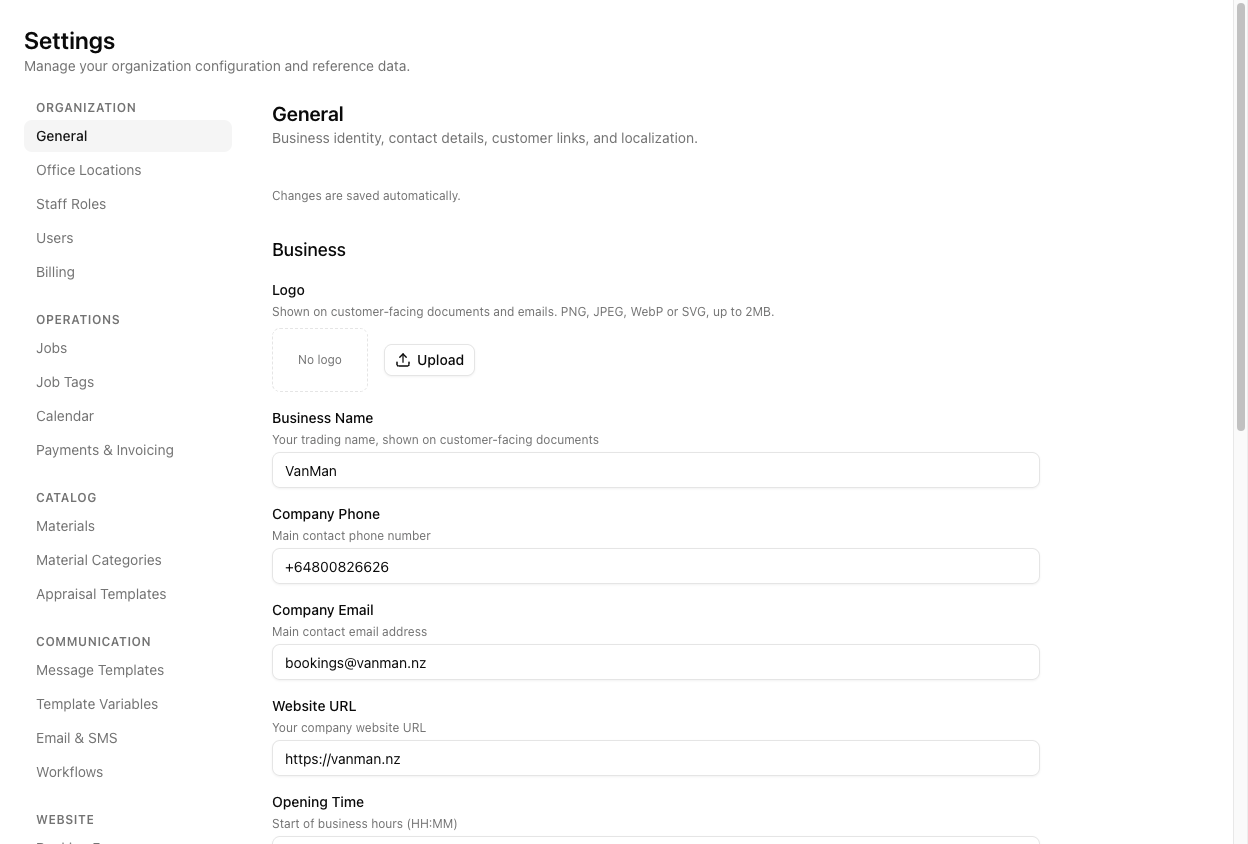
Business
Your Logo appears on customer-facing documents and emails. PNG, JPEG, WebP, or SVG, up to 2MB. If you skip this, documents fall back to your business name as text.
Business Name is your trading name, and it is what customers see on quotes, invoices, and confirmations. It is also available in message templates as {{BusinessName}}.
Company Phone and Company Email are your main contact points, shown to customers on job confirmations and used as the reply-to on outgoing mail. Add your Website URL too — it appears in templates as {{WebsiteUrl}}.
Opening Time and Closing Time (in HH:MM) define your office hours. These are not decorative: the job form displays them as a guide when you schedule, and the calendar uses them to frame the working day.
Customer Links
Three links get reused across your customer messaging, so set them once here:
- Website Terms Link — your terms and conditions page, available as
{{WebsiteTermsLink}}. - Review Link — where customers leave a review, typically your Google review URL. Available as
{{ReviewLink}}and commonly used in the job-completion template. - Opt Out Link — how customers unsubscribe from marketing messages, available as
{{OptOutLink}}.
Localization
Timezone sets the default timezone for your whole organisation — every job time, calendar view, and scheduled notification is rendered against it, regardless of where your crew are physically located. Default Country controls which country address autocomplete biases its suggestions toward.
Your business address is not on this page. Depot and office addresses are managed separately under Settings > Office Locations. GST is not configured here either — see below.
Where GST lives
VanMan does not store a GST or tax number on the business profile. What it stores is a GST Rate (%) under Settings > Payments & Invoicing, in the Tax Settings section — enter 15 for 15%. That same page also holds your payment terms, deposit link, bank account details, cancellation policy, and whether invoices land in Xero as Draft or Authorised.
Tutorial: set up a new business profile
Follow this from a fresh account to a profile that produces correct documents.
Click Settings in the sidebar. You land on Settings > General, the first item under the Organization group.
Click Upload next to Logo and choose your logo file — keep it under 2MB. In Business Name, type your trading name exactly as you want it printed on an invoice, e.g. VanMan. Notice there is no save step; the field stores itself.
Set Company Phone to your bookings line in full international format, e.g. +64800826626. Set Company Email to the inbox you actually watch, e.g. bookings@vanman.nz — customer replies land there. Set Website URL to https://vanman.nz.
Set Opening Time to 06:00 and Closing Time to 18:00. Now open the job form: the Schedule header reads Office hours 06:00–18:00, giving whoever books a job the right frame.
Paste your terms URL into Website Terms Link and your Google review URL into Review Link. These now resolve in every template that uses {{WebsiteTermsLink}} and {{ReviewLink}} — including the job-completion thank-you email, which asks for the review.
Under Localization, check Timezone reads Pacific/Auckland and Default Country reads New Zealand. The country setting is why typing a street name into a job address suggests New Zealand addresses first.
Click Payments & Invoicing in the settings nav. Under Tax Settings, set GST Rate (%) to 15. Invoices and quotes now calculate GST at 15%.
Open any job and generate an estimate. The business name, phone, and review link resolve from what you just entered, and GST calculates at your rate. If a placeholder appears empty on the document, the field behind it is blank on one of these two settings pages.
If a {{Variable}} renders blank on a customer document, the cause is almost always an empty field here rather than a broken template. Check General and Payments & Invoicing before editing the template.