
Creating an invoice from a job
Raise an invoice from a job's costs, review it, and send it to Xero.
An invoice is built from a job's Costs tab. Get the costs right first — the invoice is a read-only view of them.
Raise it
On a job with cost items, the header shows Create Invoice (a driver-role user does not see it, and it only appears once there are costs). Click it to open the Invoice Preview.
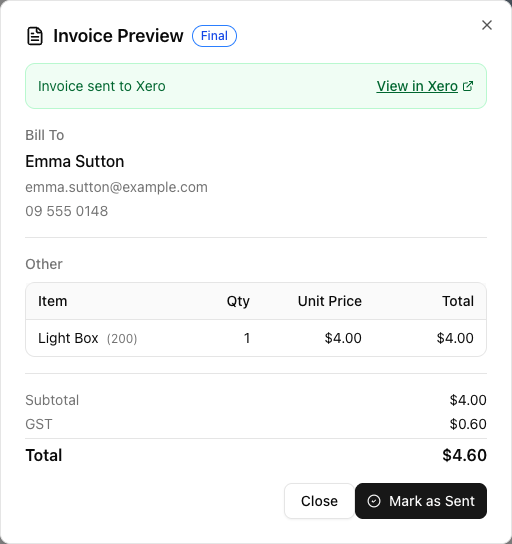
The preview is read-only. There are no line-item edits, no discount field, and no payment-terms field in this dialog. To change anything, close it, fix the Costs tab, and click Regenerate. Do not go looking for an edit control that is not there.
Draft or final
Which buttons you see depends on the Xero Invoice Status setting at Settings > Payments & Invoicing:
- Draft — the button is Send to Xero as Draft. The invoice lands in your Xero Drafts for a human to approve.
- Authorised — you Finalize first (which locks the invoice), then Send to Xero, then Mark as Sent.
Start on Draft while you are learning the flow.
Creating an invoice does not move the job's status. Sending it to Xero does.
Raising the invoice logs an activity and leaves the job where it is. Sending it to Xero moves the job to Invoiced. A job stuck on Completed with an invoice against it means the invoice was created but never sent.
Getting it to the customer
Sending to Xero is not the same as emailing the customer — those are two separate acts. To send the customer their invoice, use Send Message on the job with a template containing {{InvoiceLink}}. See sending an email from a job.
The invoices list
Invoices in the sidebar lists every invoice with filters All / Draft / Final / Sent / Paid, and columns Job, Customer, Total, Status, Created. The Job reference is the first eight characters of the job's ID.
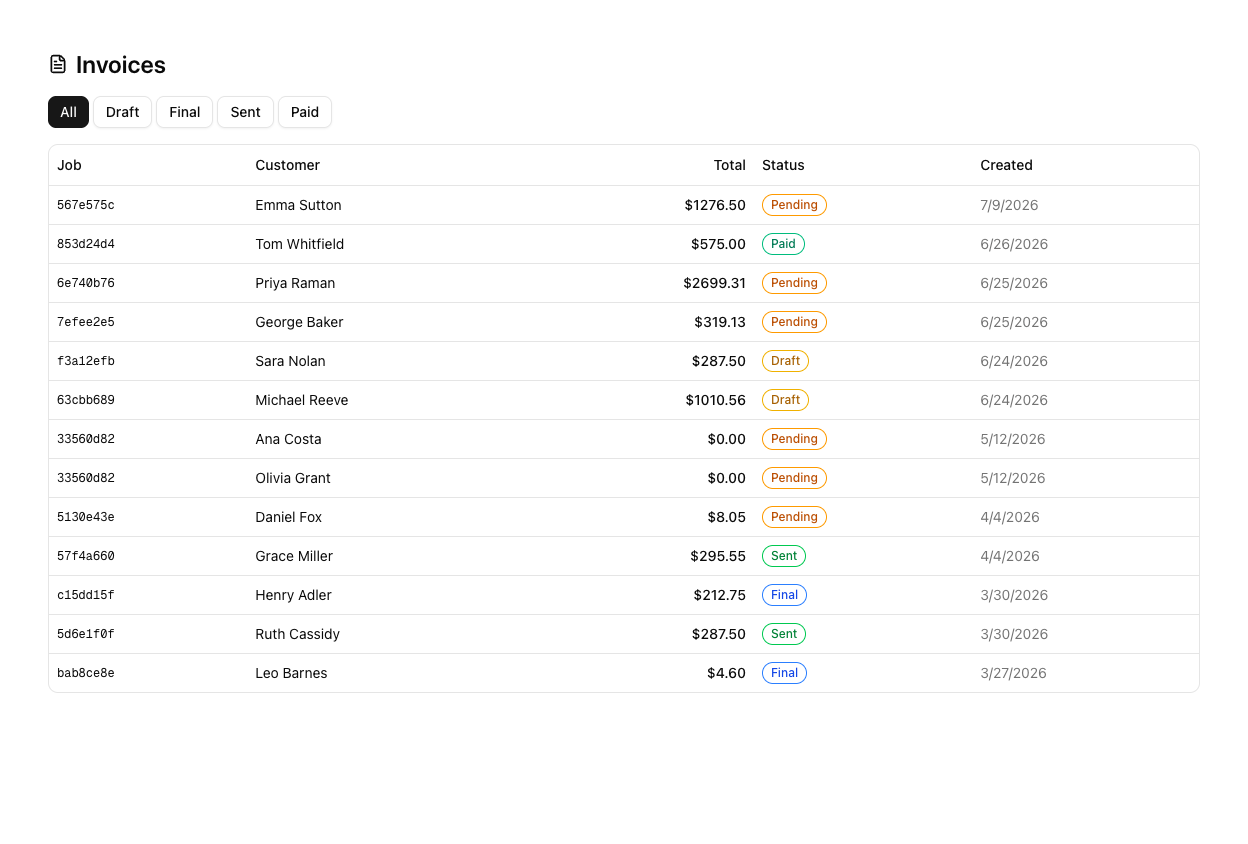
Invoice statuses are Draft, Final, Sent, Paid — there is no "viewed" or "overdue". The due date on the Xero invoice is currently fixed at 20 days regardless of your Payment Term setting.
Tutorial: invoice a completed move
The Henderson move is done. Bill it.
Open the job's Costs tab and make sure every line is right — the crew hours, the travel, the materials. The invoice is a mirror of this tab, so anything wrong here is wrong on the invoice.
Click Create Invoice in the header. The Invoice Preview shows Bill To, the line items grouped by category, and the Subtotal / GST / Total.
Check the numbers. If a line is wrong, resist looking for an edit button — there isn't one. Close the dialog, correct the Costs tab, reopen, and use Regenerate.
With Xero Invoice Status on Draft, click Send to Xero as Draft. It lands in your Xero Drafts, where you approve it before it is final.
Look at the job's status. Sending pushed it to Invoiced. If it is still Completed, the send did not happen — check the Xero connection.
Open Xero, find the draft, and confirm the line items, the GST, and that each line hit the account code you set on your material categories. Wrong accounts are a catalog fix, not an invoice fix.
Sending to Xero did not tell the customer anything. Back on the job, Send Message with your invoice email template — the one with {{InvoiceLink}} — so they actually receive it.
Once a few invoices have gone through clean, consider switching Xero Invoice Status to Authorised and turning on Auto-send Invoices at Settings > Payments & Invoicing so completed jobs invoice themselves.